Craft ideas for kids - hand animals or Handimals!

Activity Duration: 1-3 hours
I first came across Handimals or hand animals at the 3-foot Festival, a fantastic annual 3-day event held in Chelmsford, Essex aimed entirely at pre-school children. We’ve been making them once a year ever since.
Most kids absolutely love arts and crafts and it’s a shame that as we get older, many of us lose that early instinct. The great thing about hand animals are that both adults and children can get involved. When you do it together you’re almost guaranteed a fantastic result. The children love getting their hands messy with paint and creating the handprints, whilst we all love adding details to the handprints once they have dried and seeing the animals come to life.
This activity is great for most ages, from the very young, to older children who have the skill and curiosity to make their own creations with less supervision. The first time I did this, my eldest daughter was only 8 months old and it got pretty messy. She is now 8 years old and has decided she is too old to do it this year, so from this, I would advise the optimal age is from 3-7 years old!
You can also make Feetimals or feet animals, although from personal experience, this has only worked well with my oldest daughter in the last couple of years. Unless you like tiny painted footsteps across your kitchen :)
I have kept a hand animal from each year and created a Handimal scrapbook as a keepsake. It’s lovely to see how their hands have grown over the years.
Another great point about this craft is that you barely need any equipment. I will talk you through a basic animal, then go into other options depending how much time and equipment you have.
Table of Contents
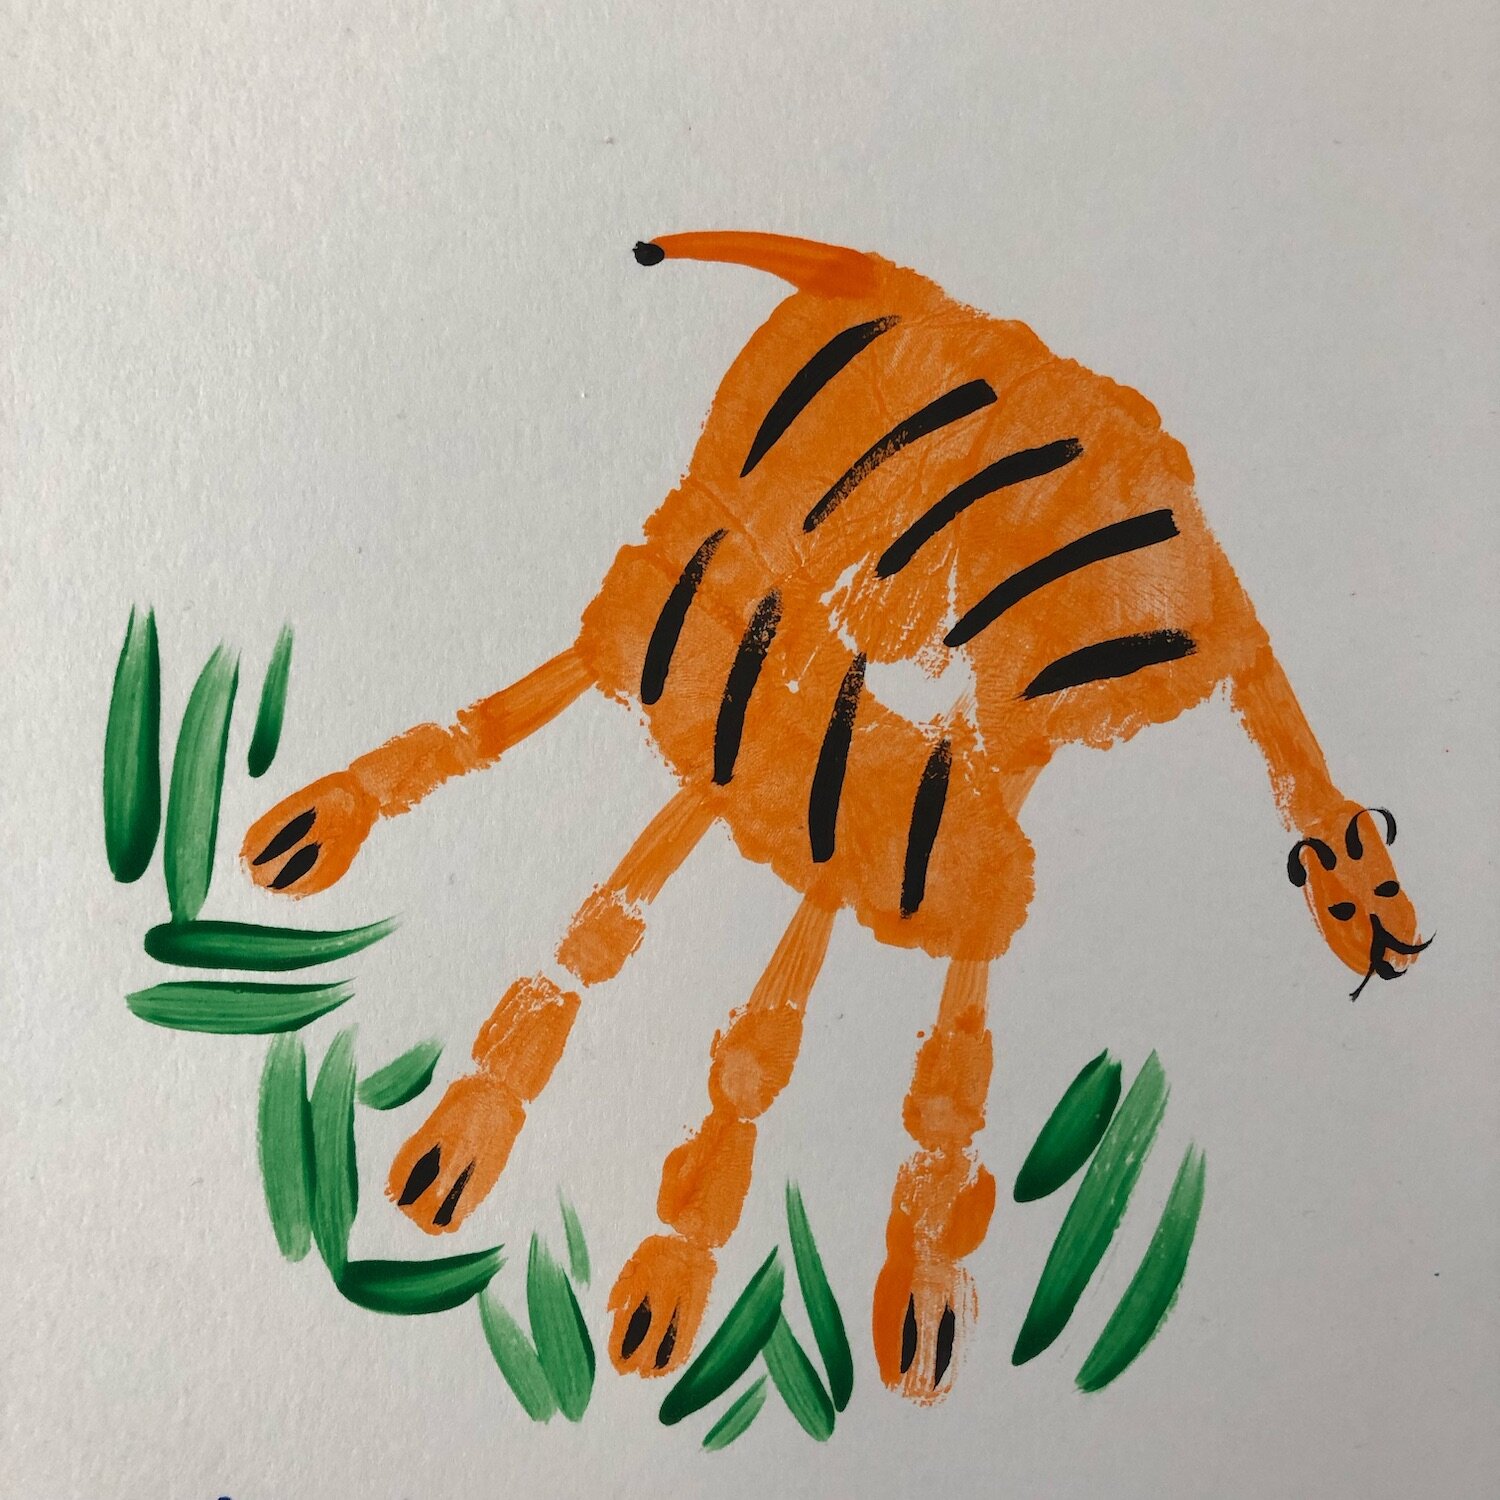
Tiger Handimal - Instructions

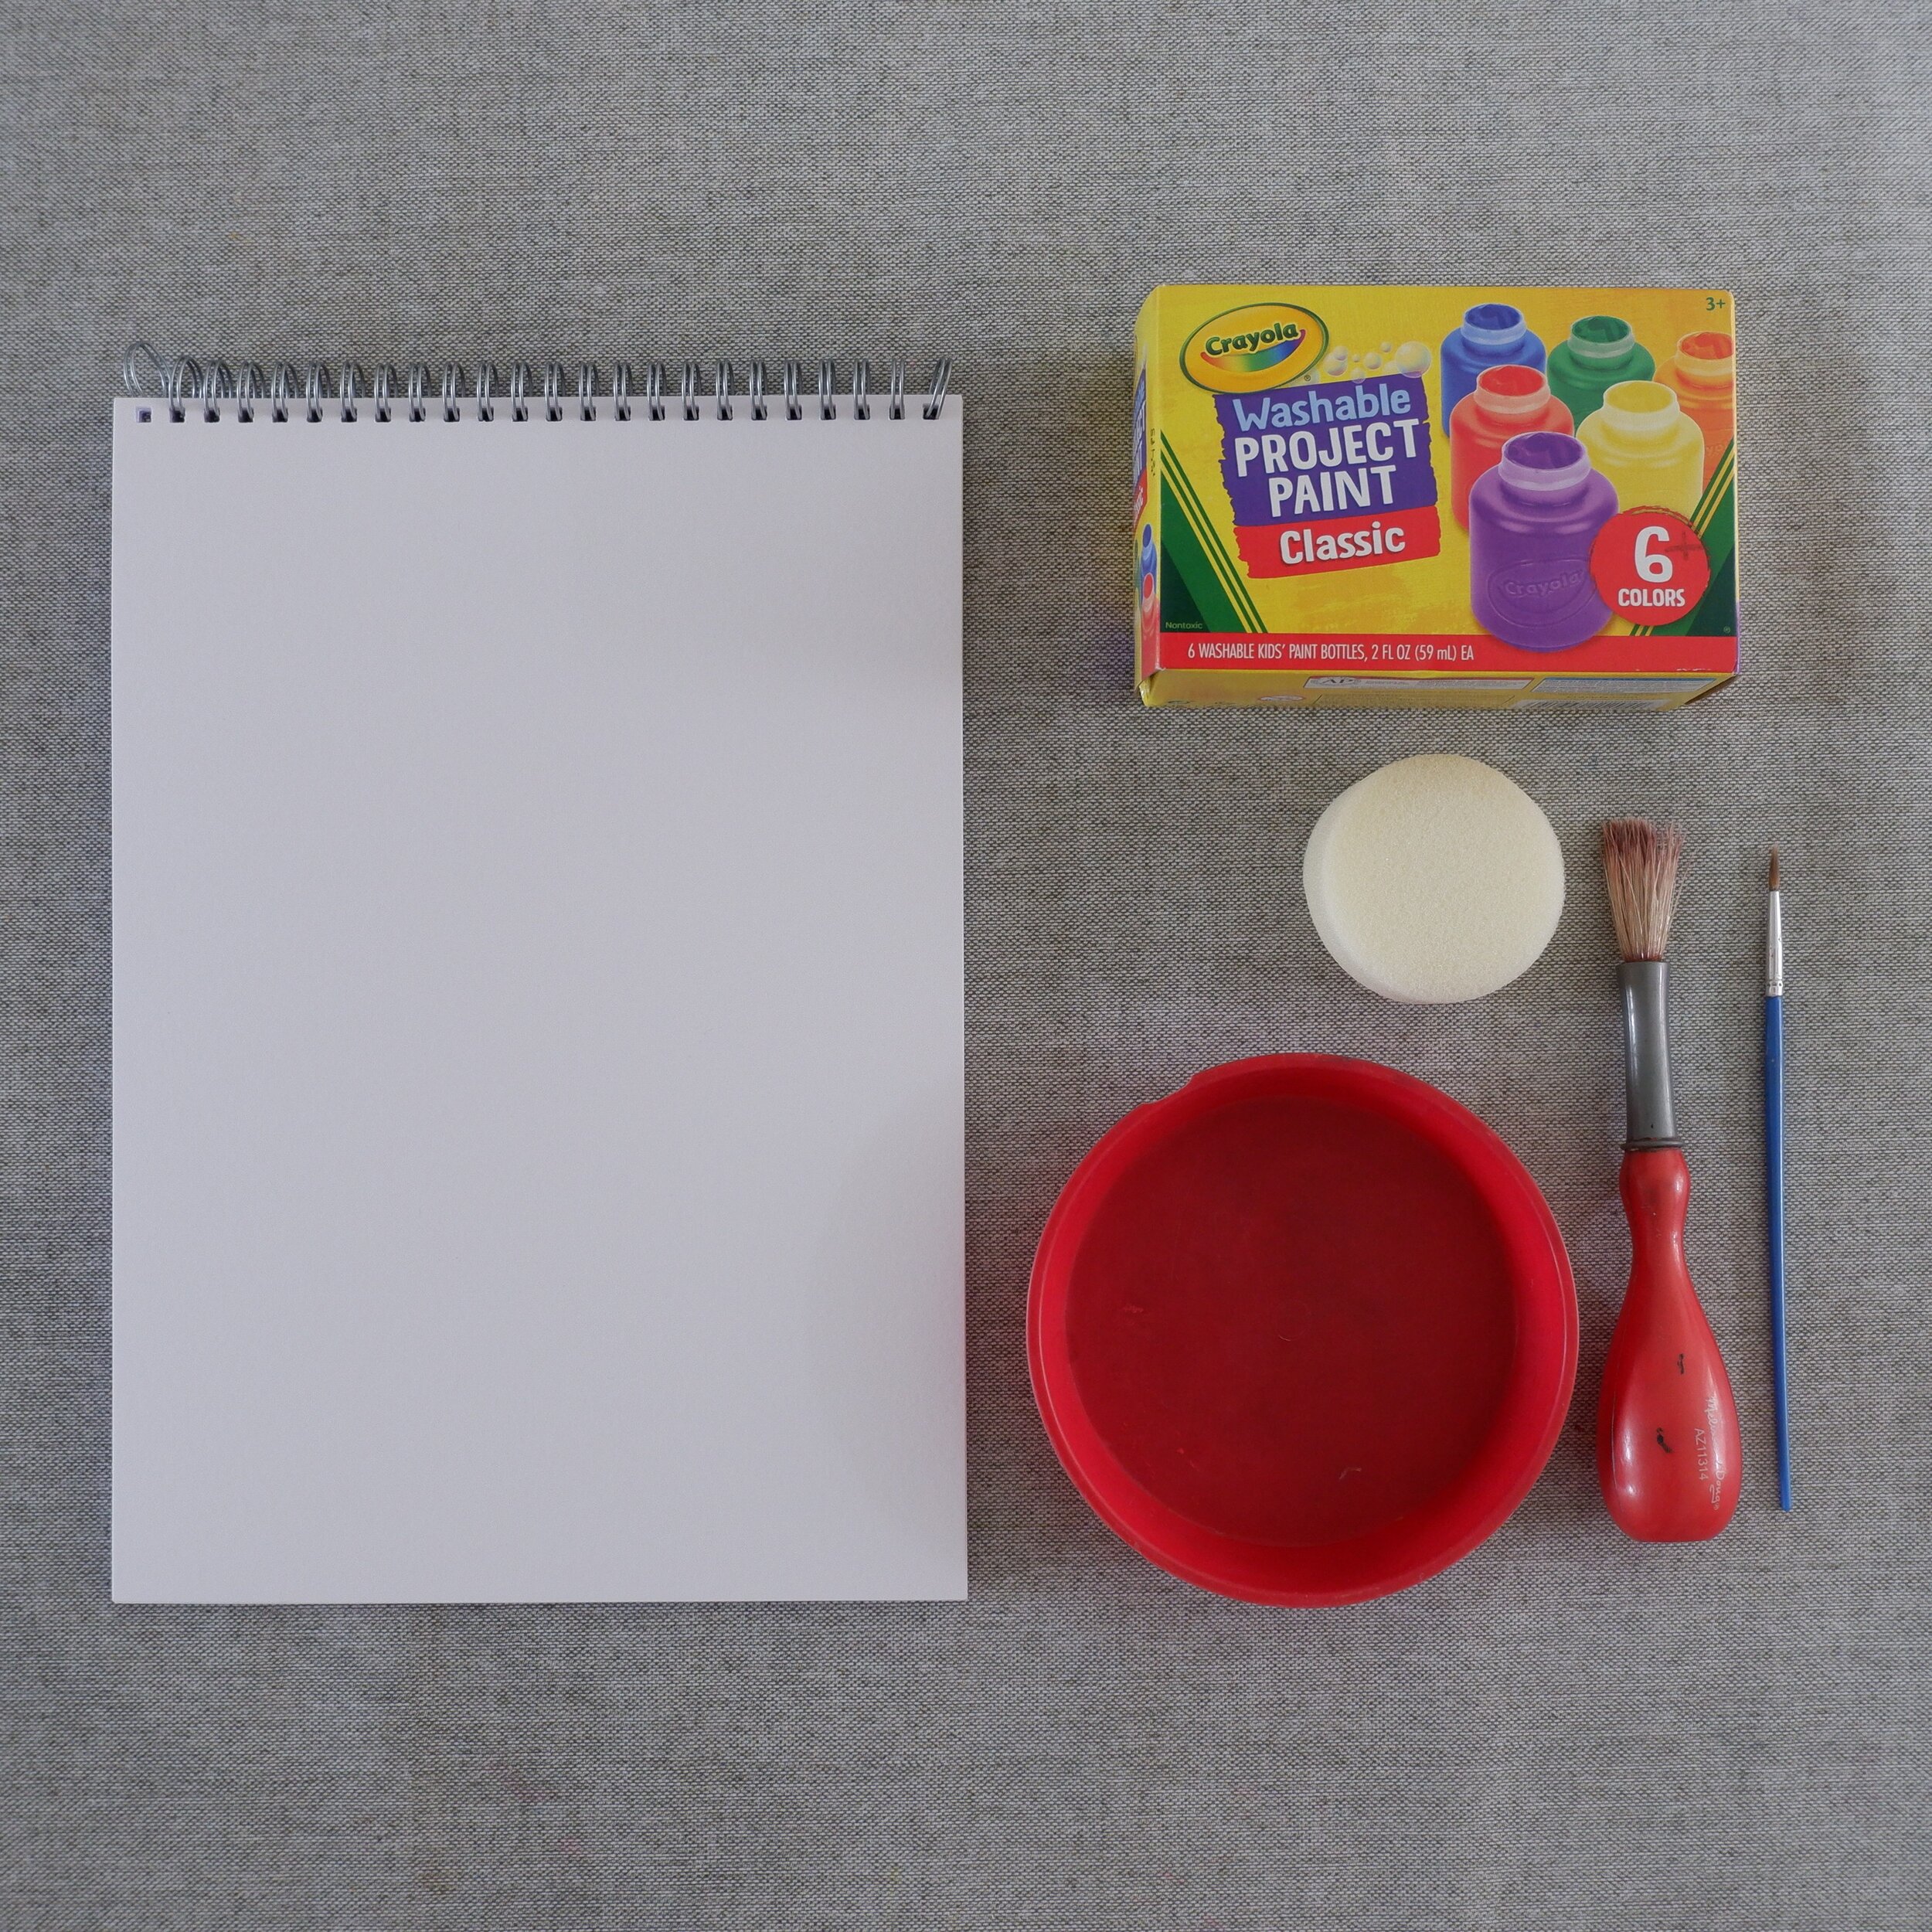
Equipment to make handimals:
An apron
Washable paints - Orange, green and black
Paint tray
Paper
A sponge or medium sized paint brush
Small paint brush
Cup of water
Old towel
Instructions to make handimals:

Make sure you have some space available to put the handprints to dry
Put a cup of water on the table for the dirty paintbrushes
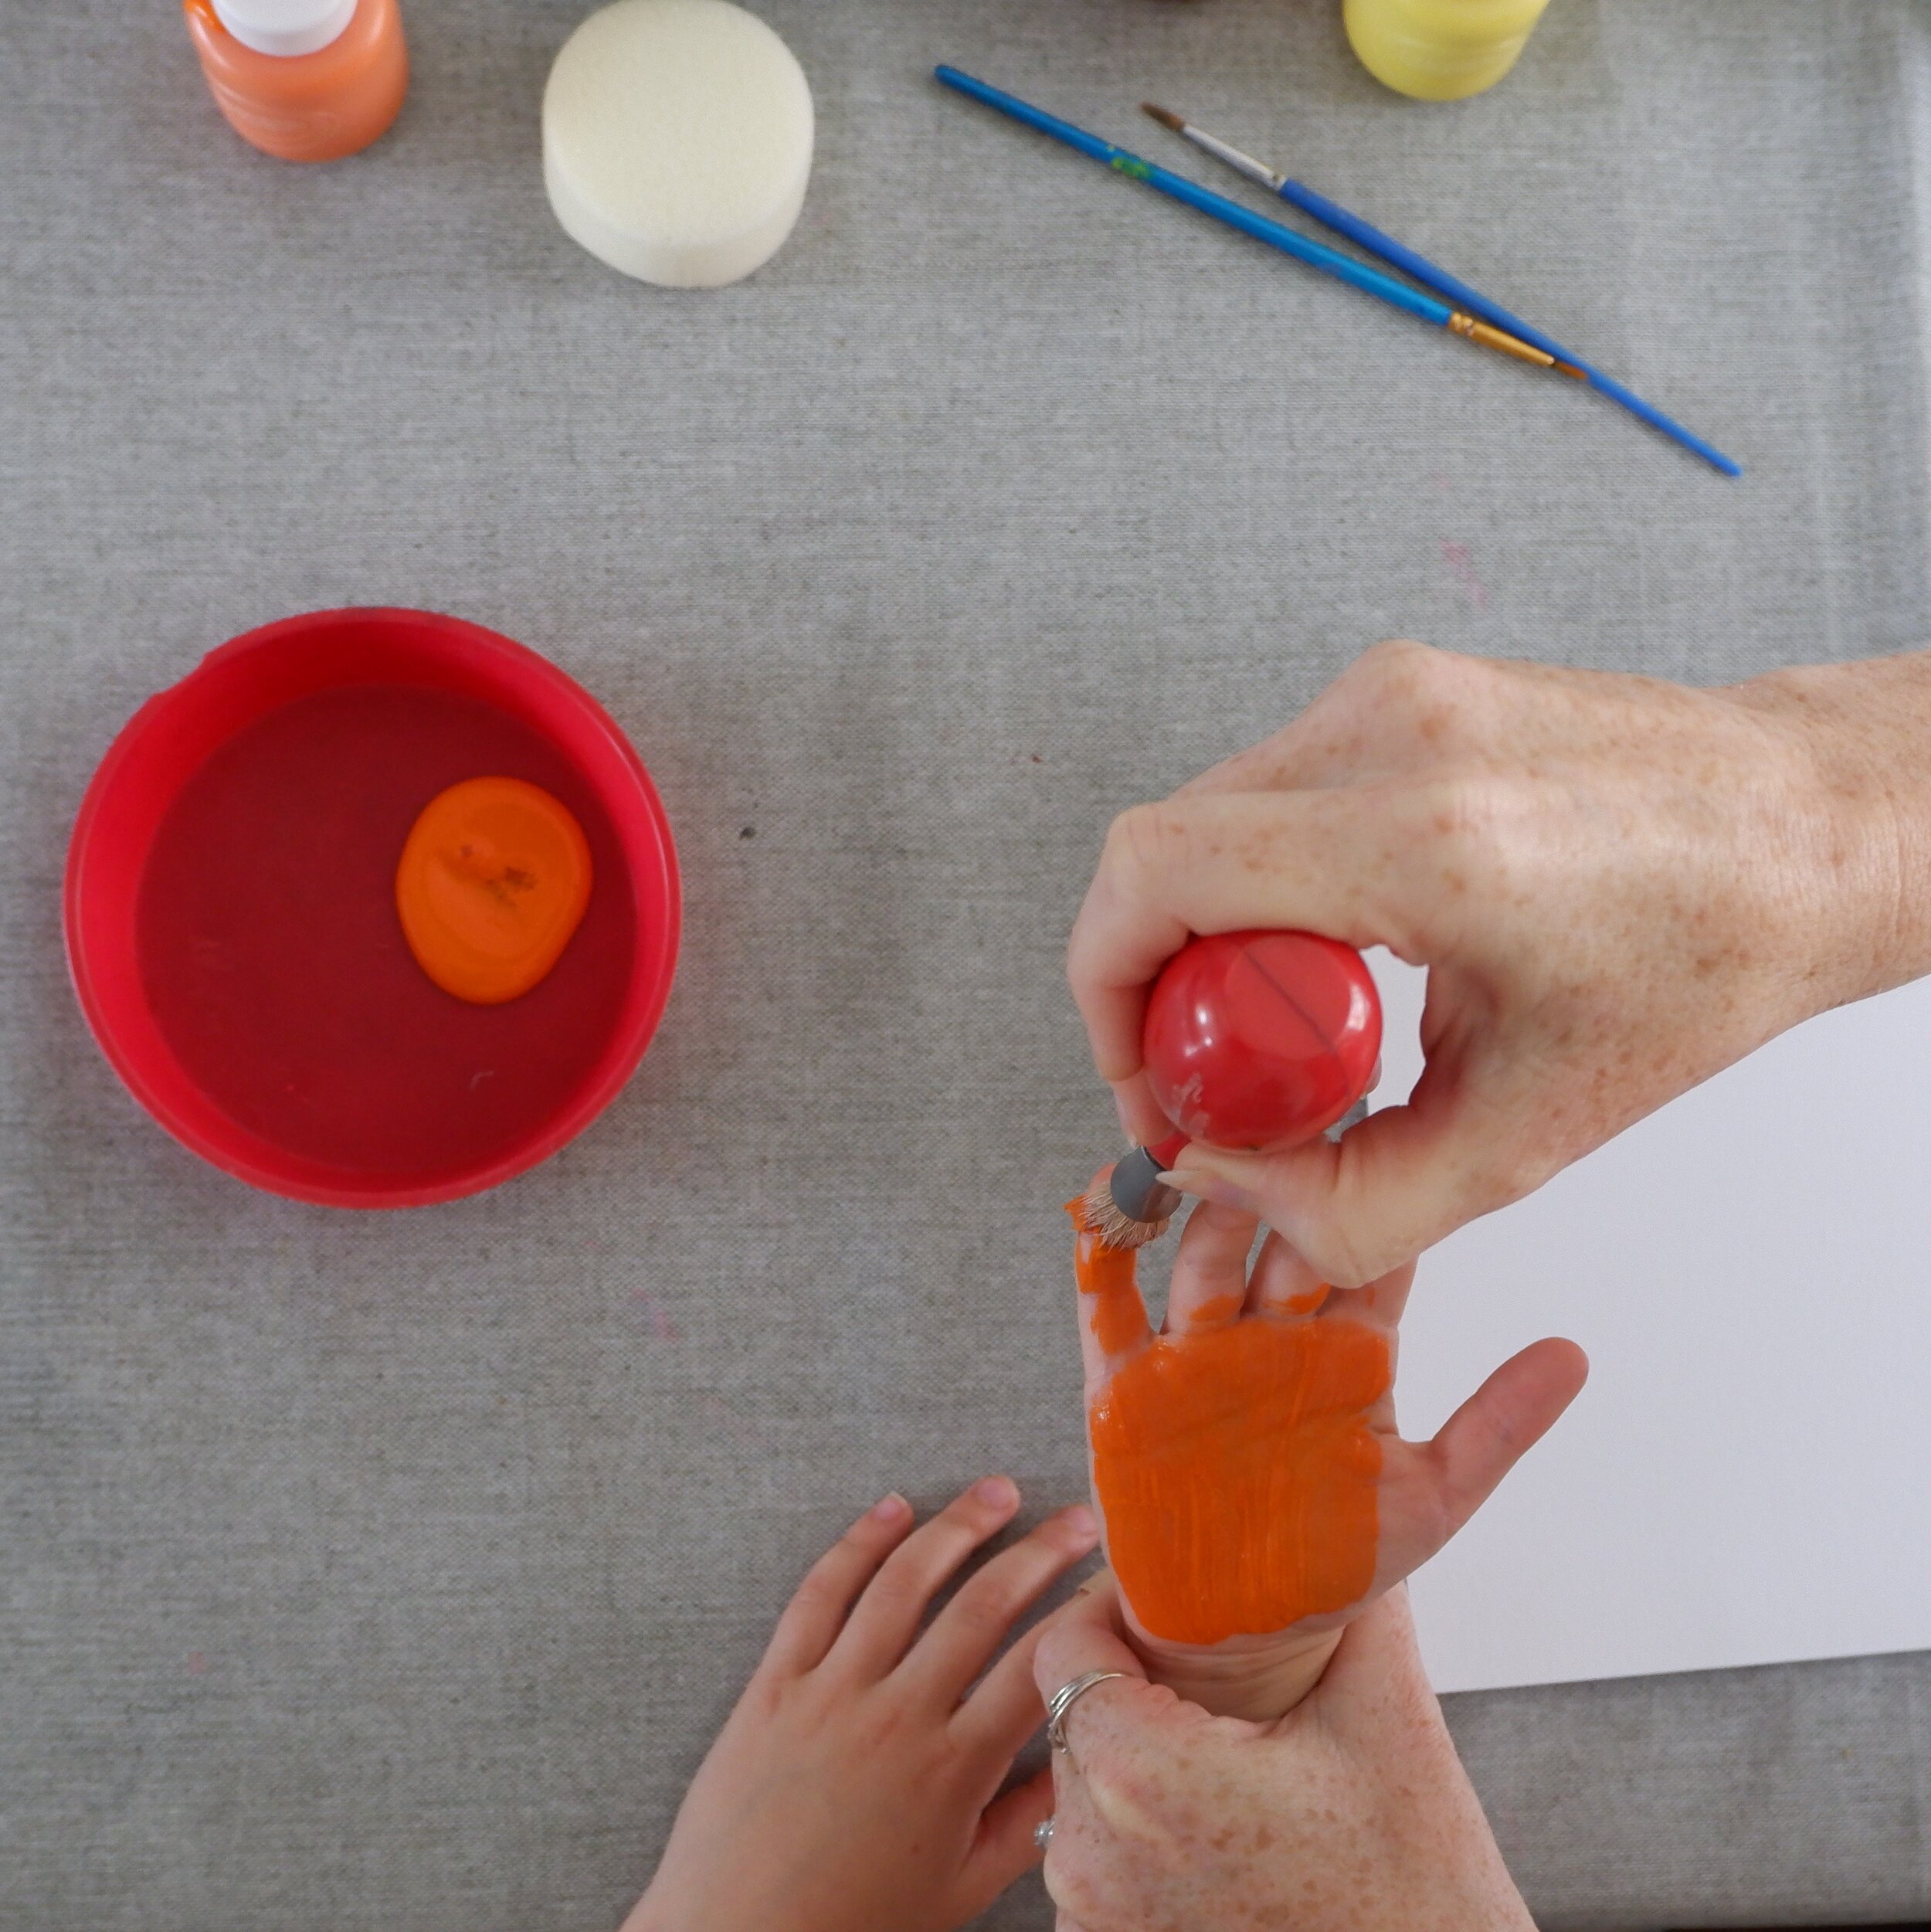
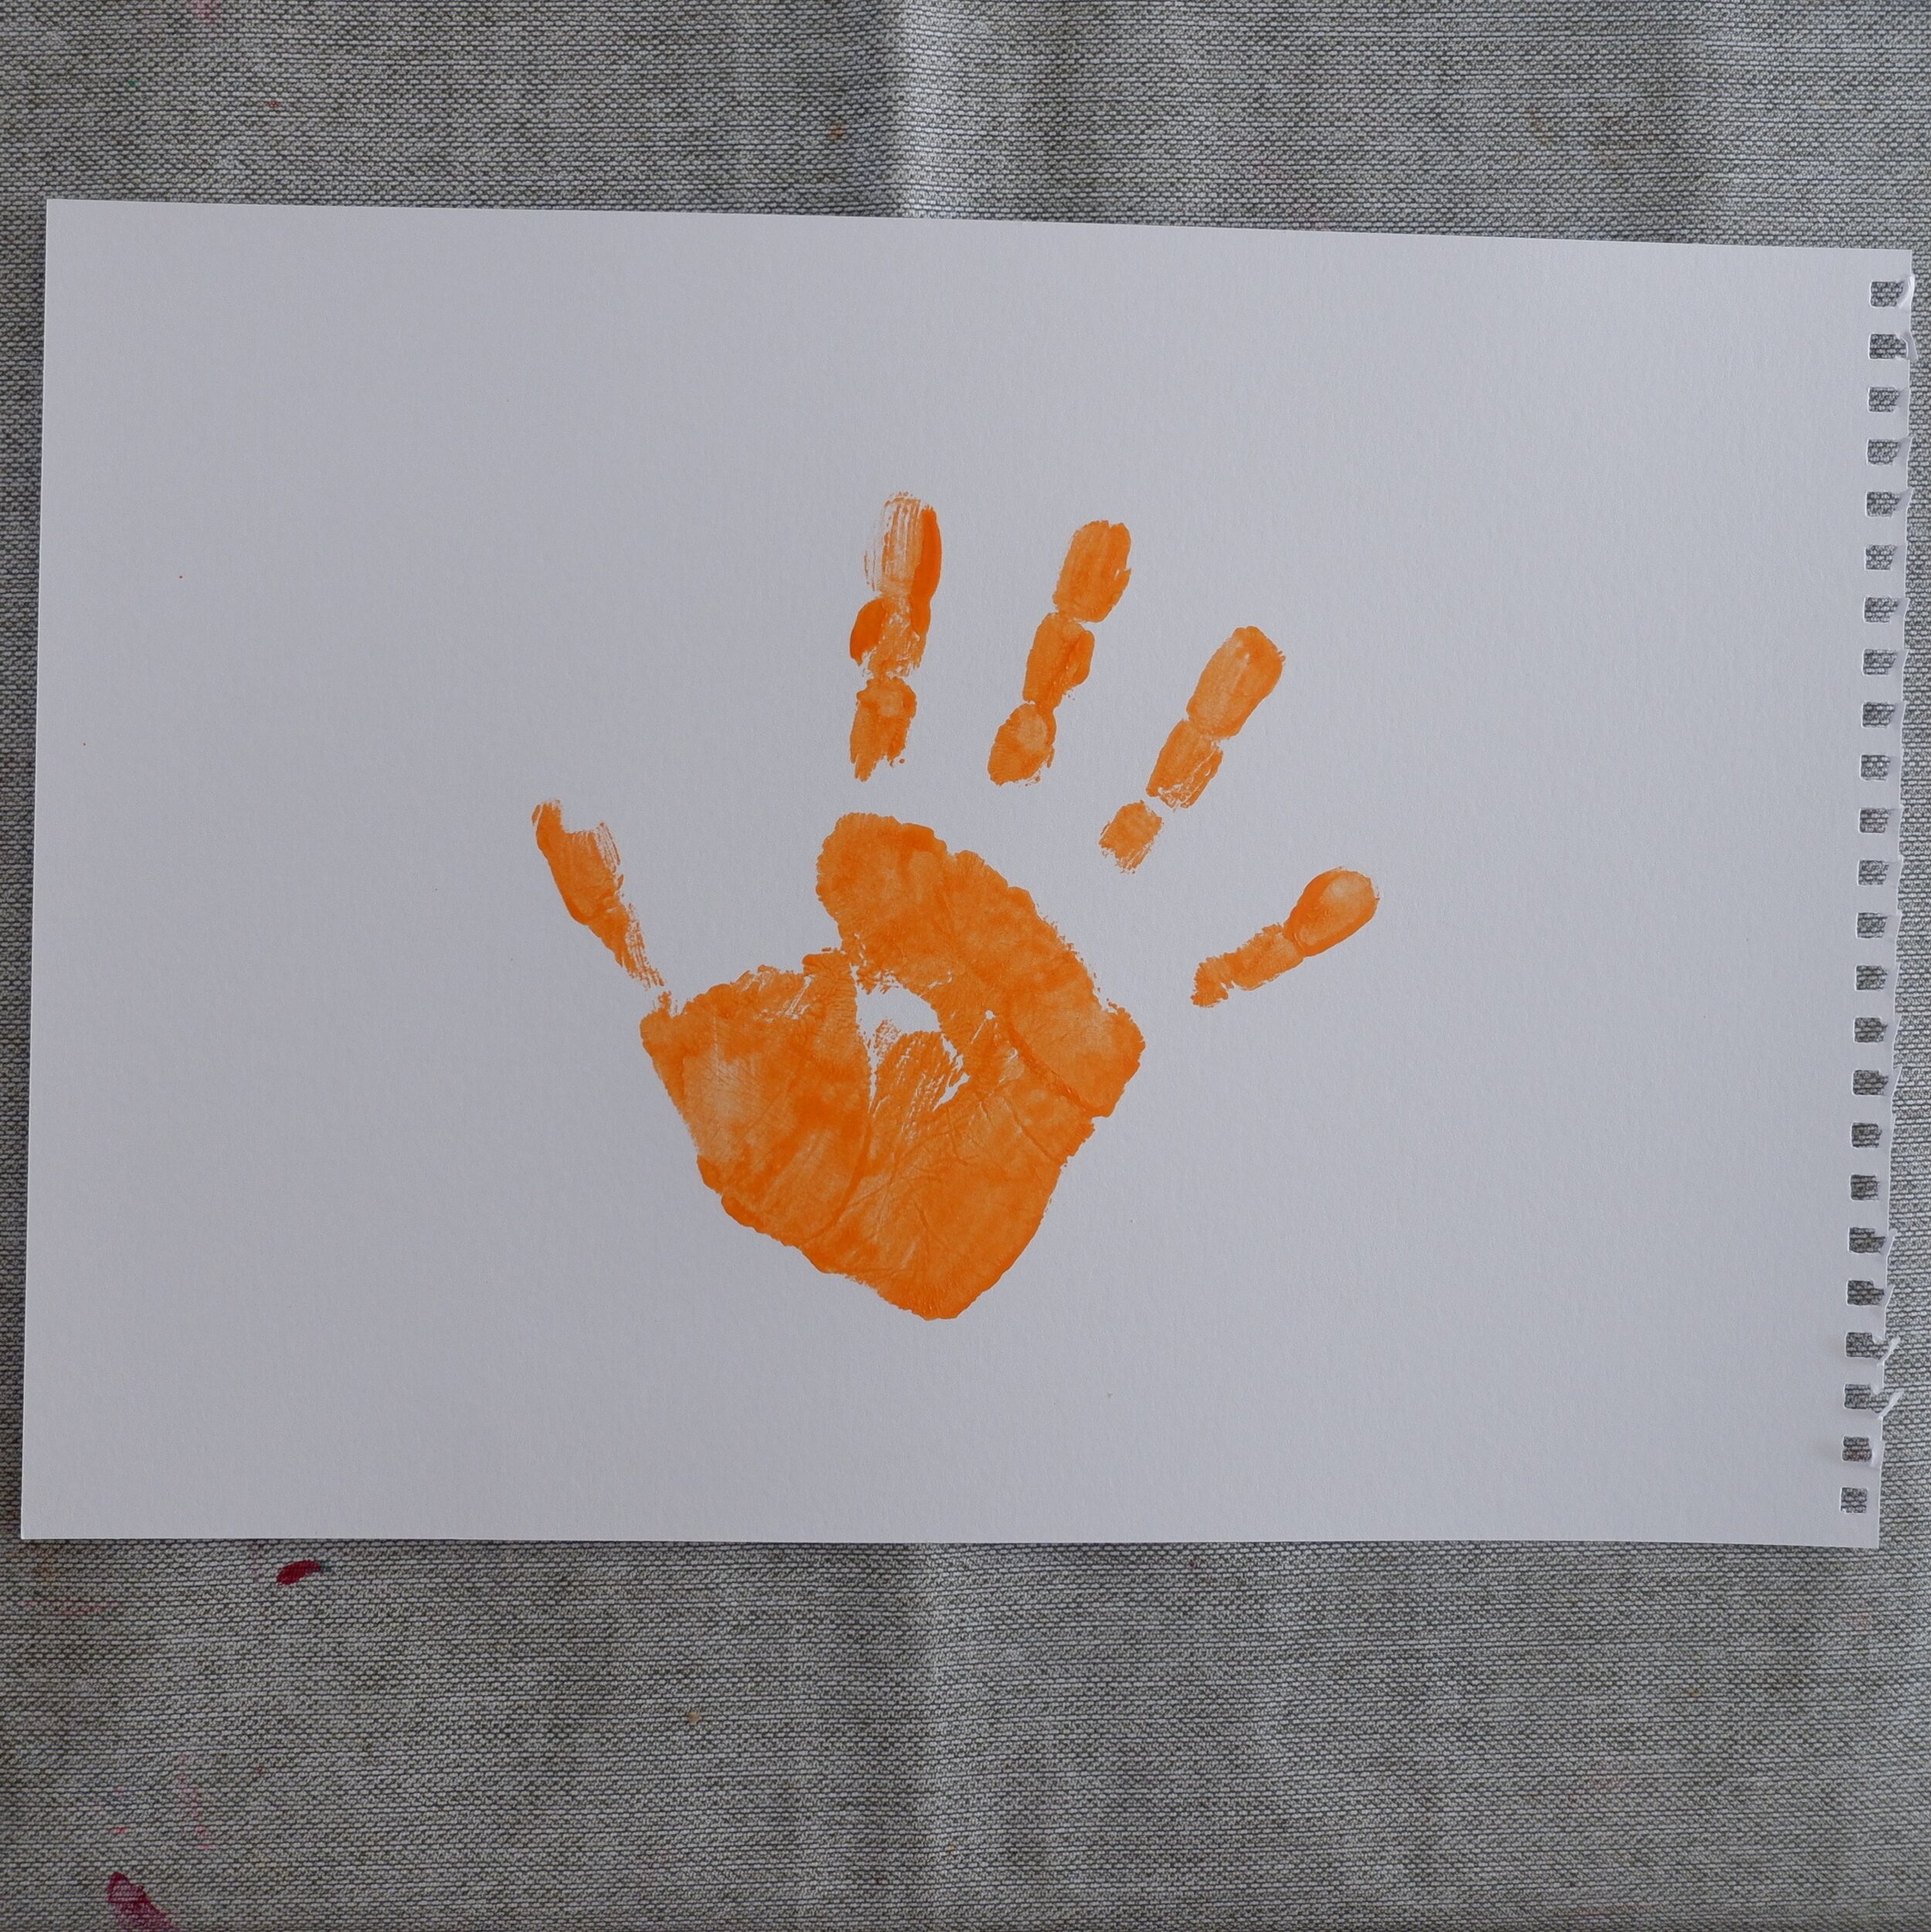
Pour some orange paints into a tray
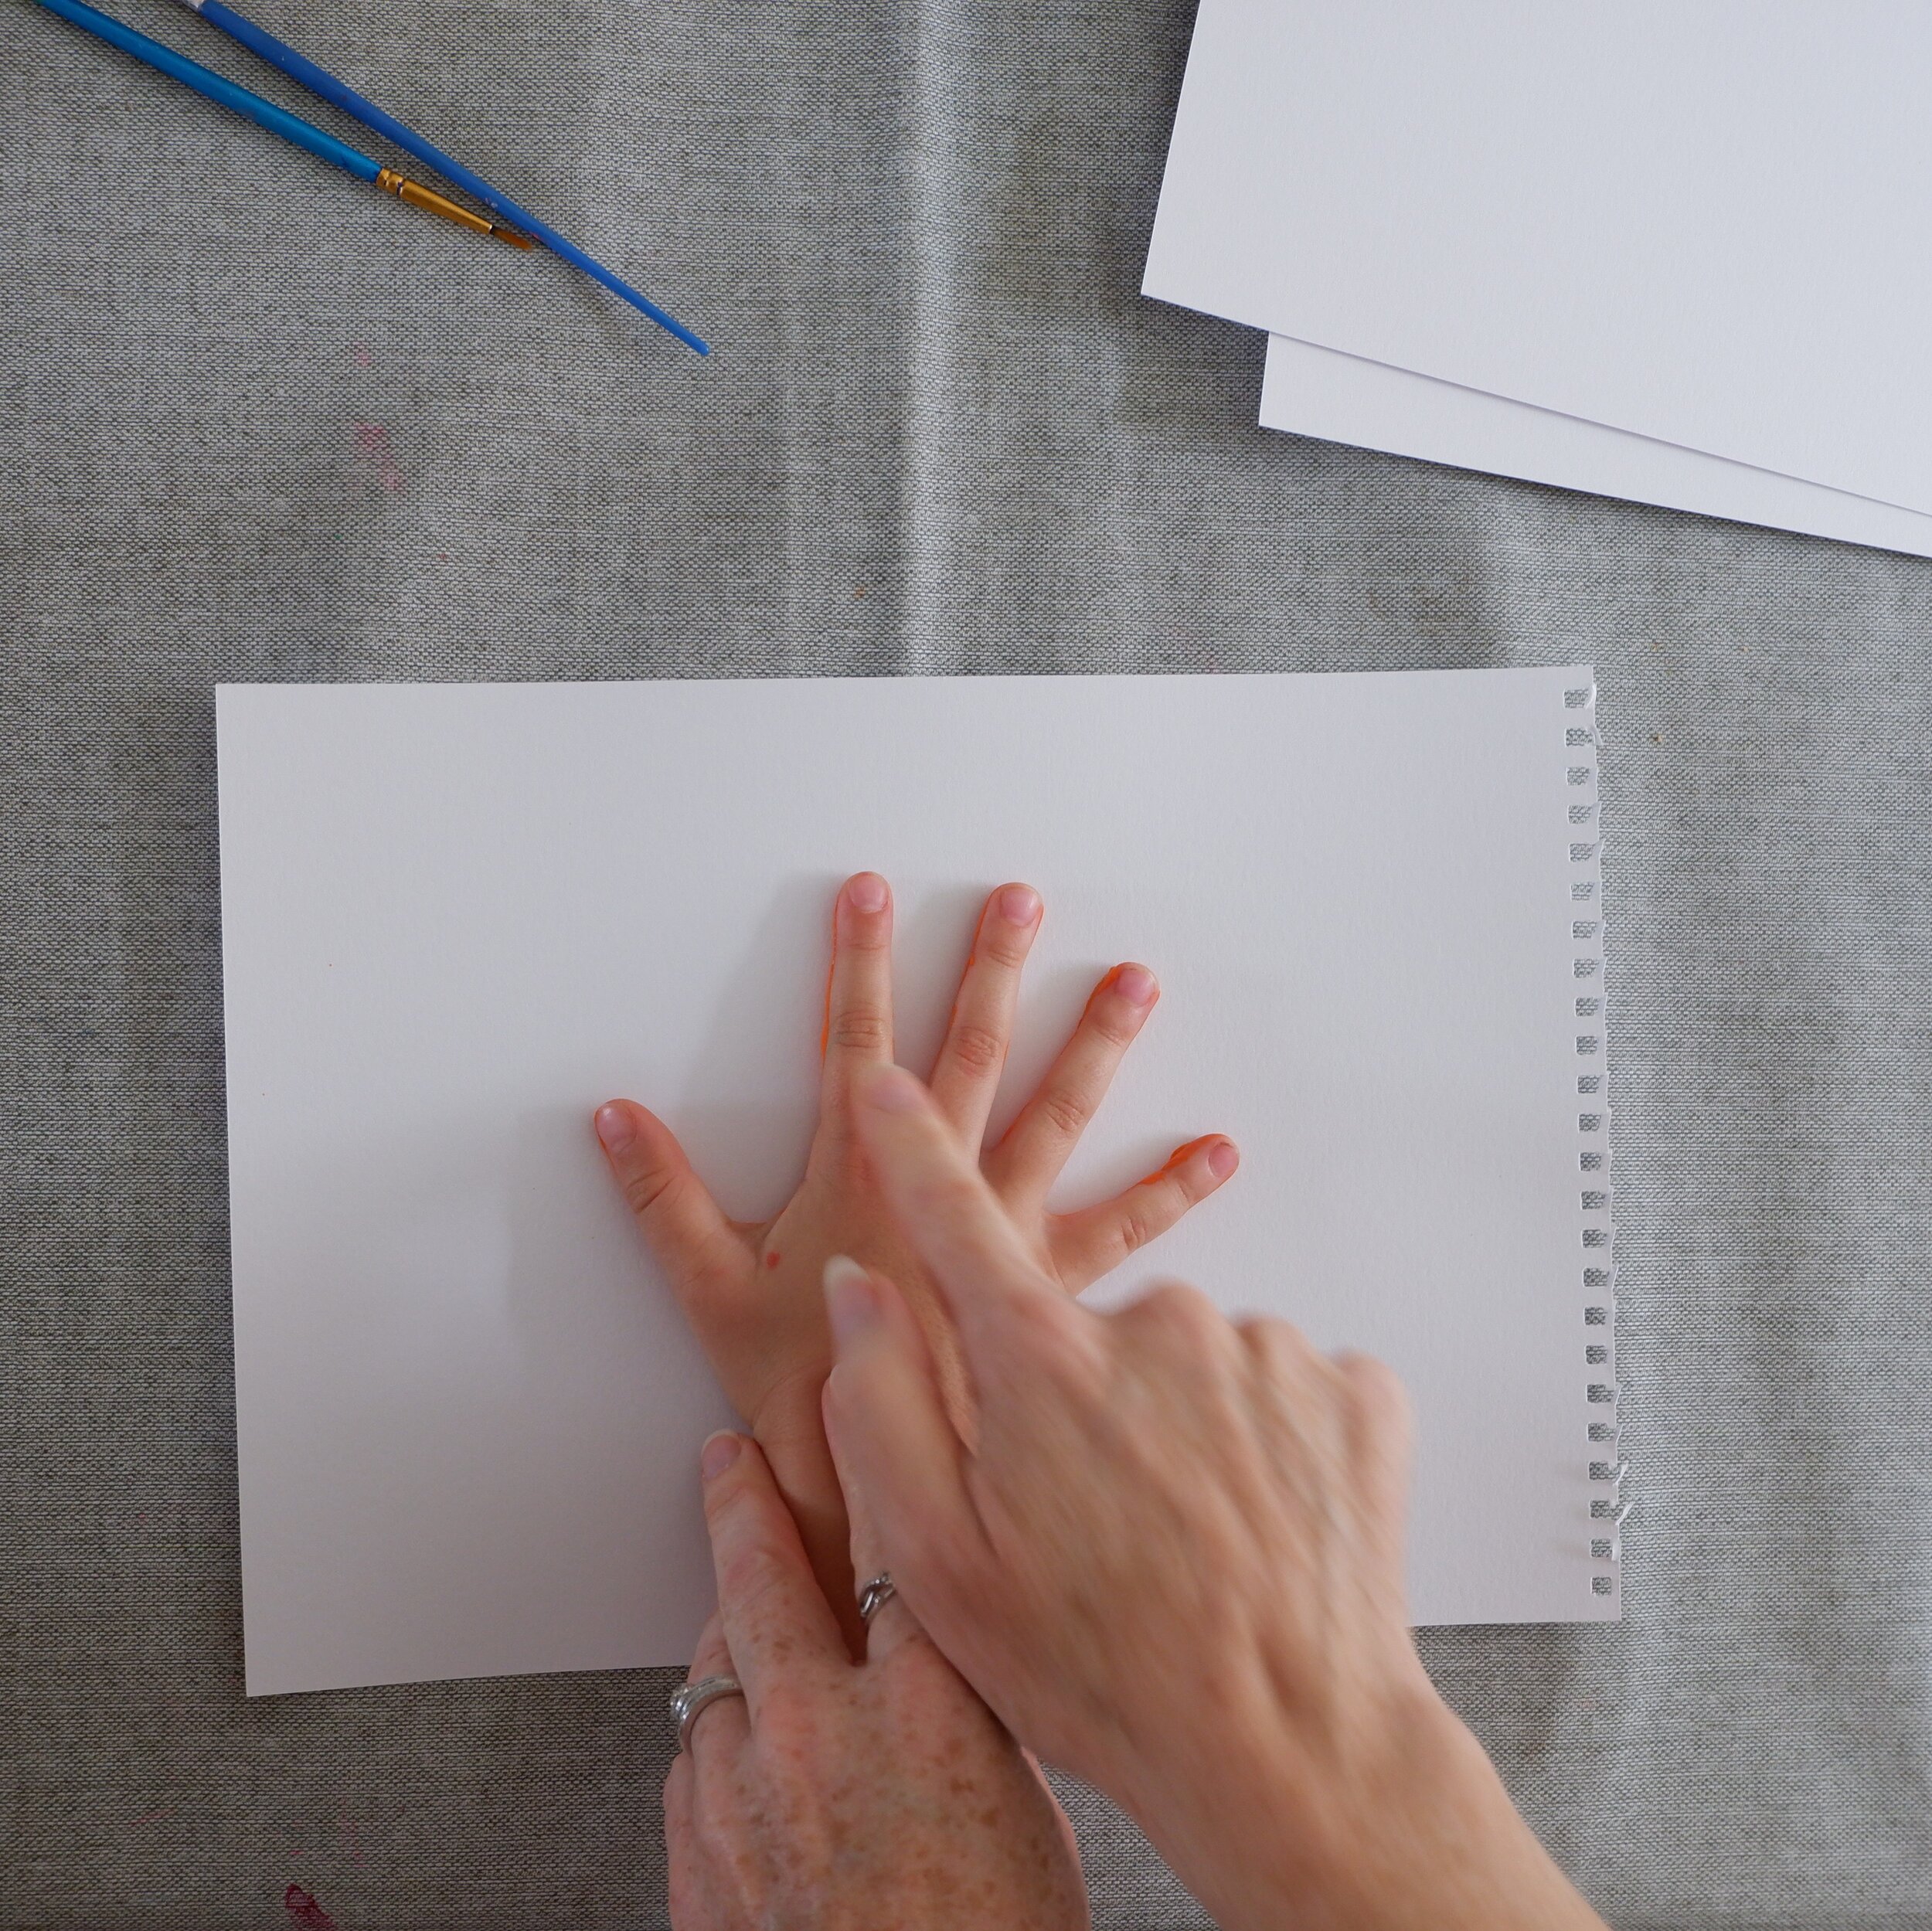
Use the sponge or a medium sized paint brush to cover your child’s hand with orange paint
Make as many handprints as you would like
Put the handprints to the side to dry
While you wait for the handprints to dry, clean up your child’s hand - this is where the old towel comes in handy
I usually let my child do their own painting while we wait or you can go and have a snack and come back later
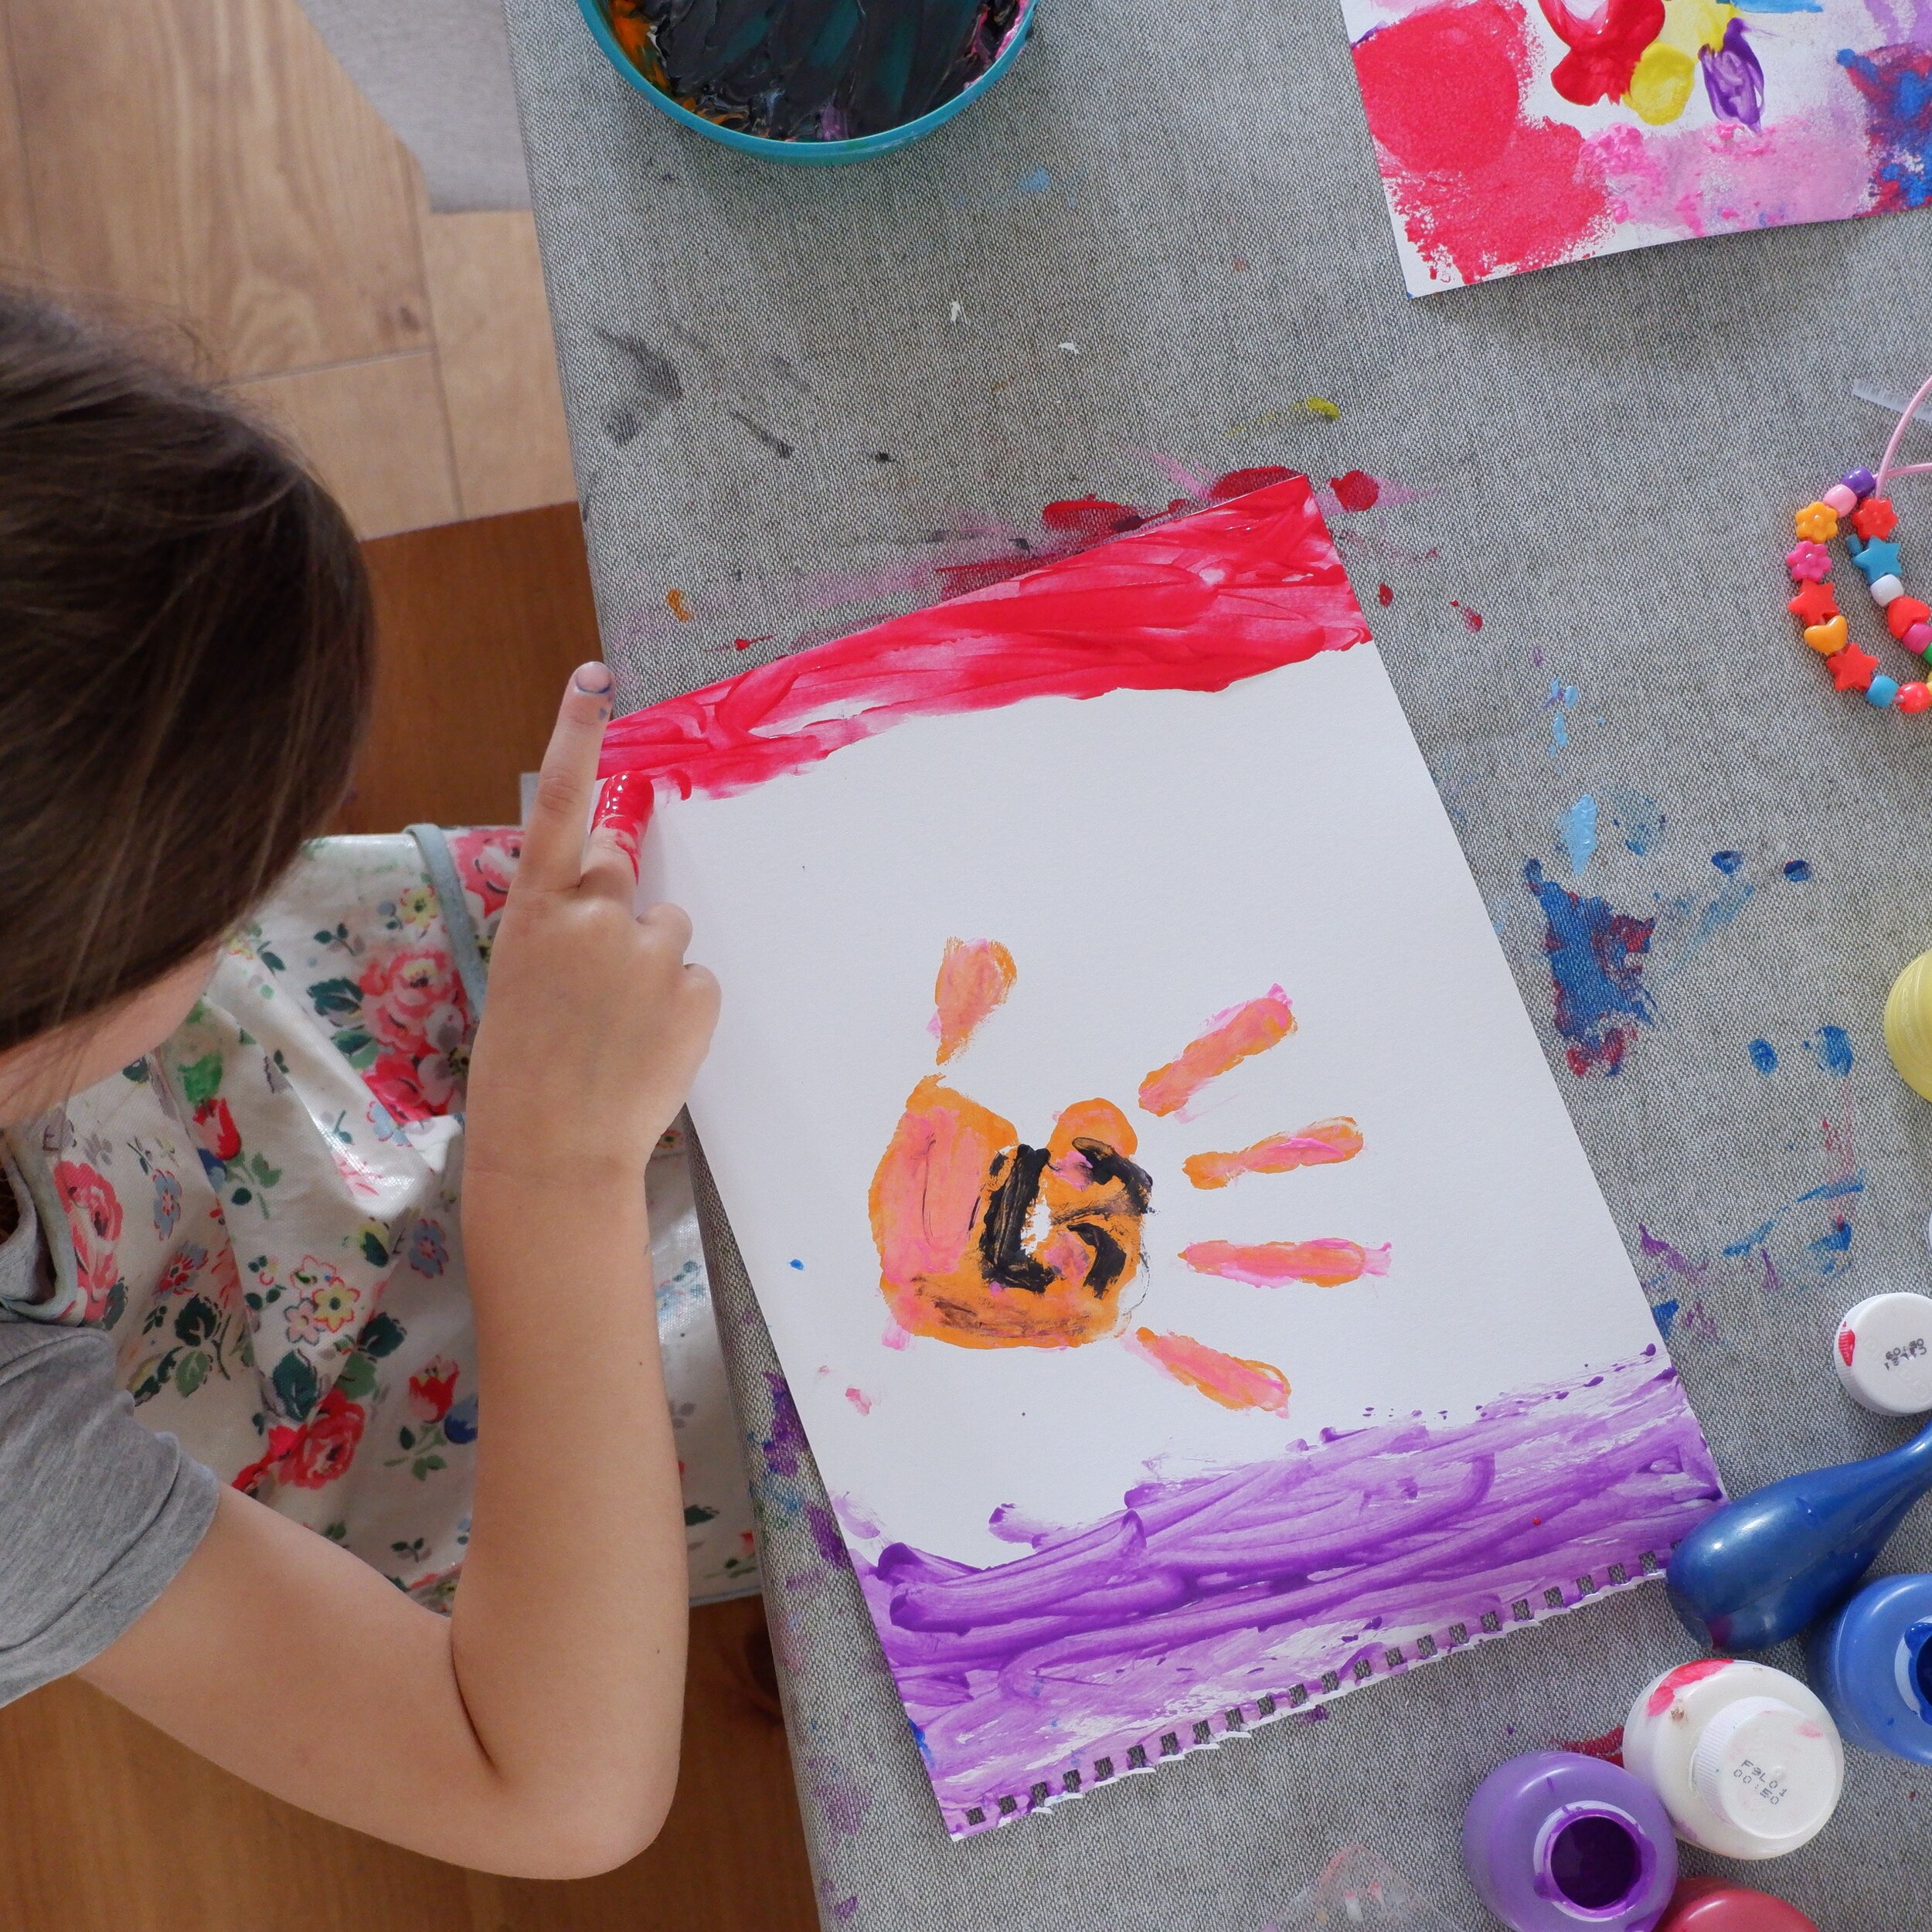
When the handprints are dry, split them into a pile for you and a pile for your child
Younger children will want to paint on their handprints freely
For adults and older children, use the remaining orange paint to fill in any gaps or patches in the handprints
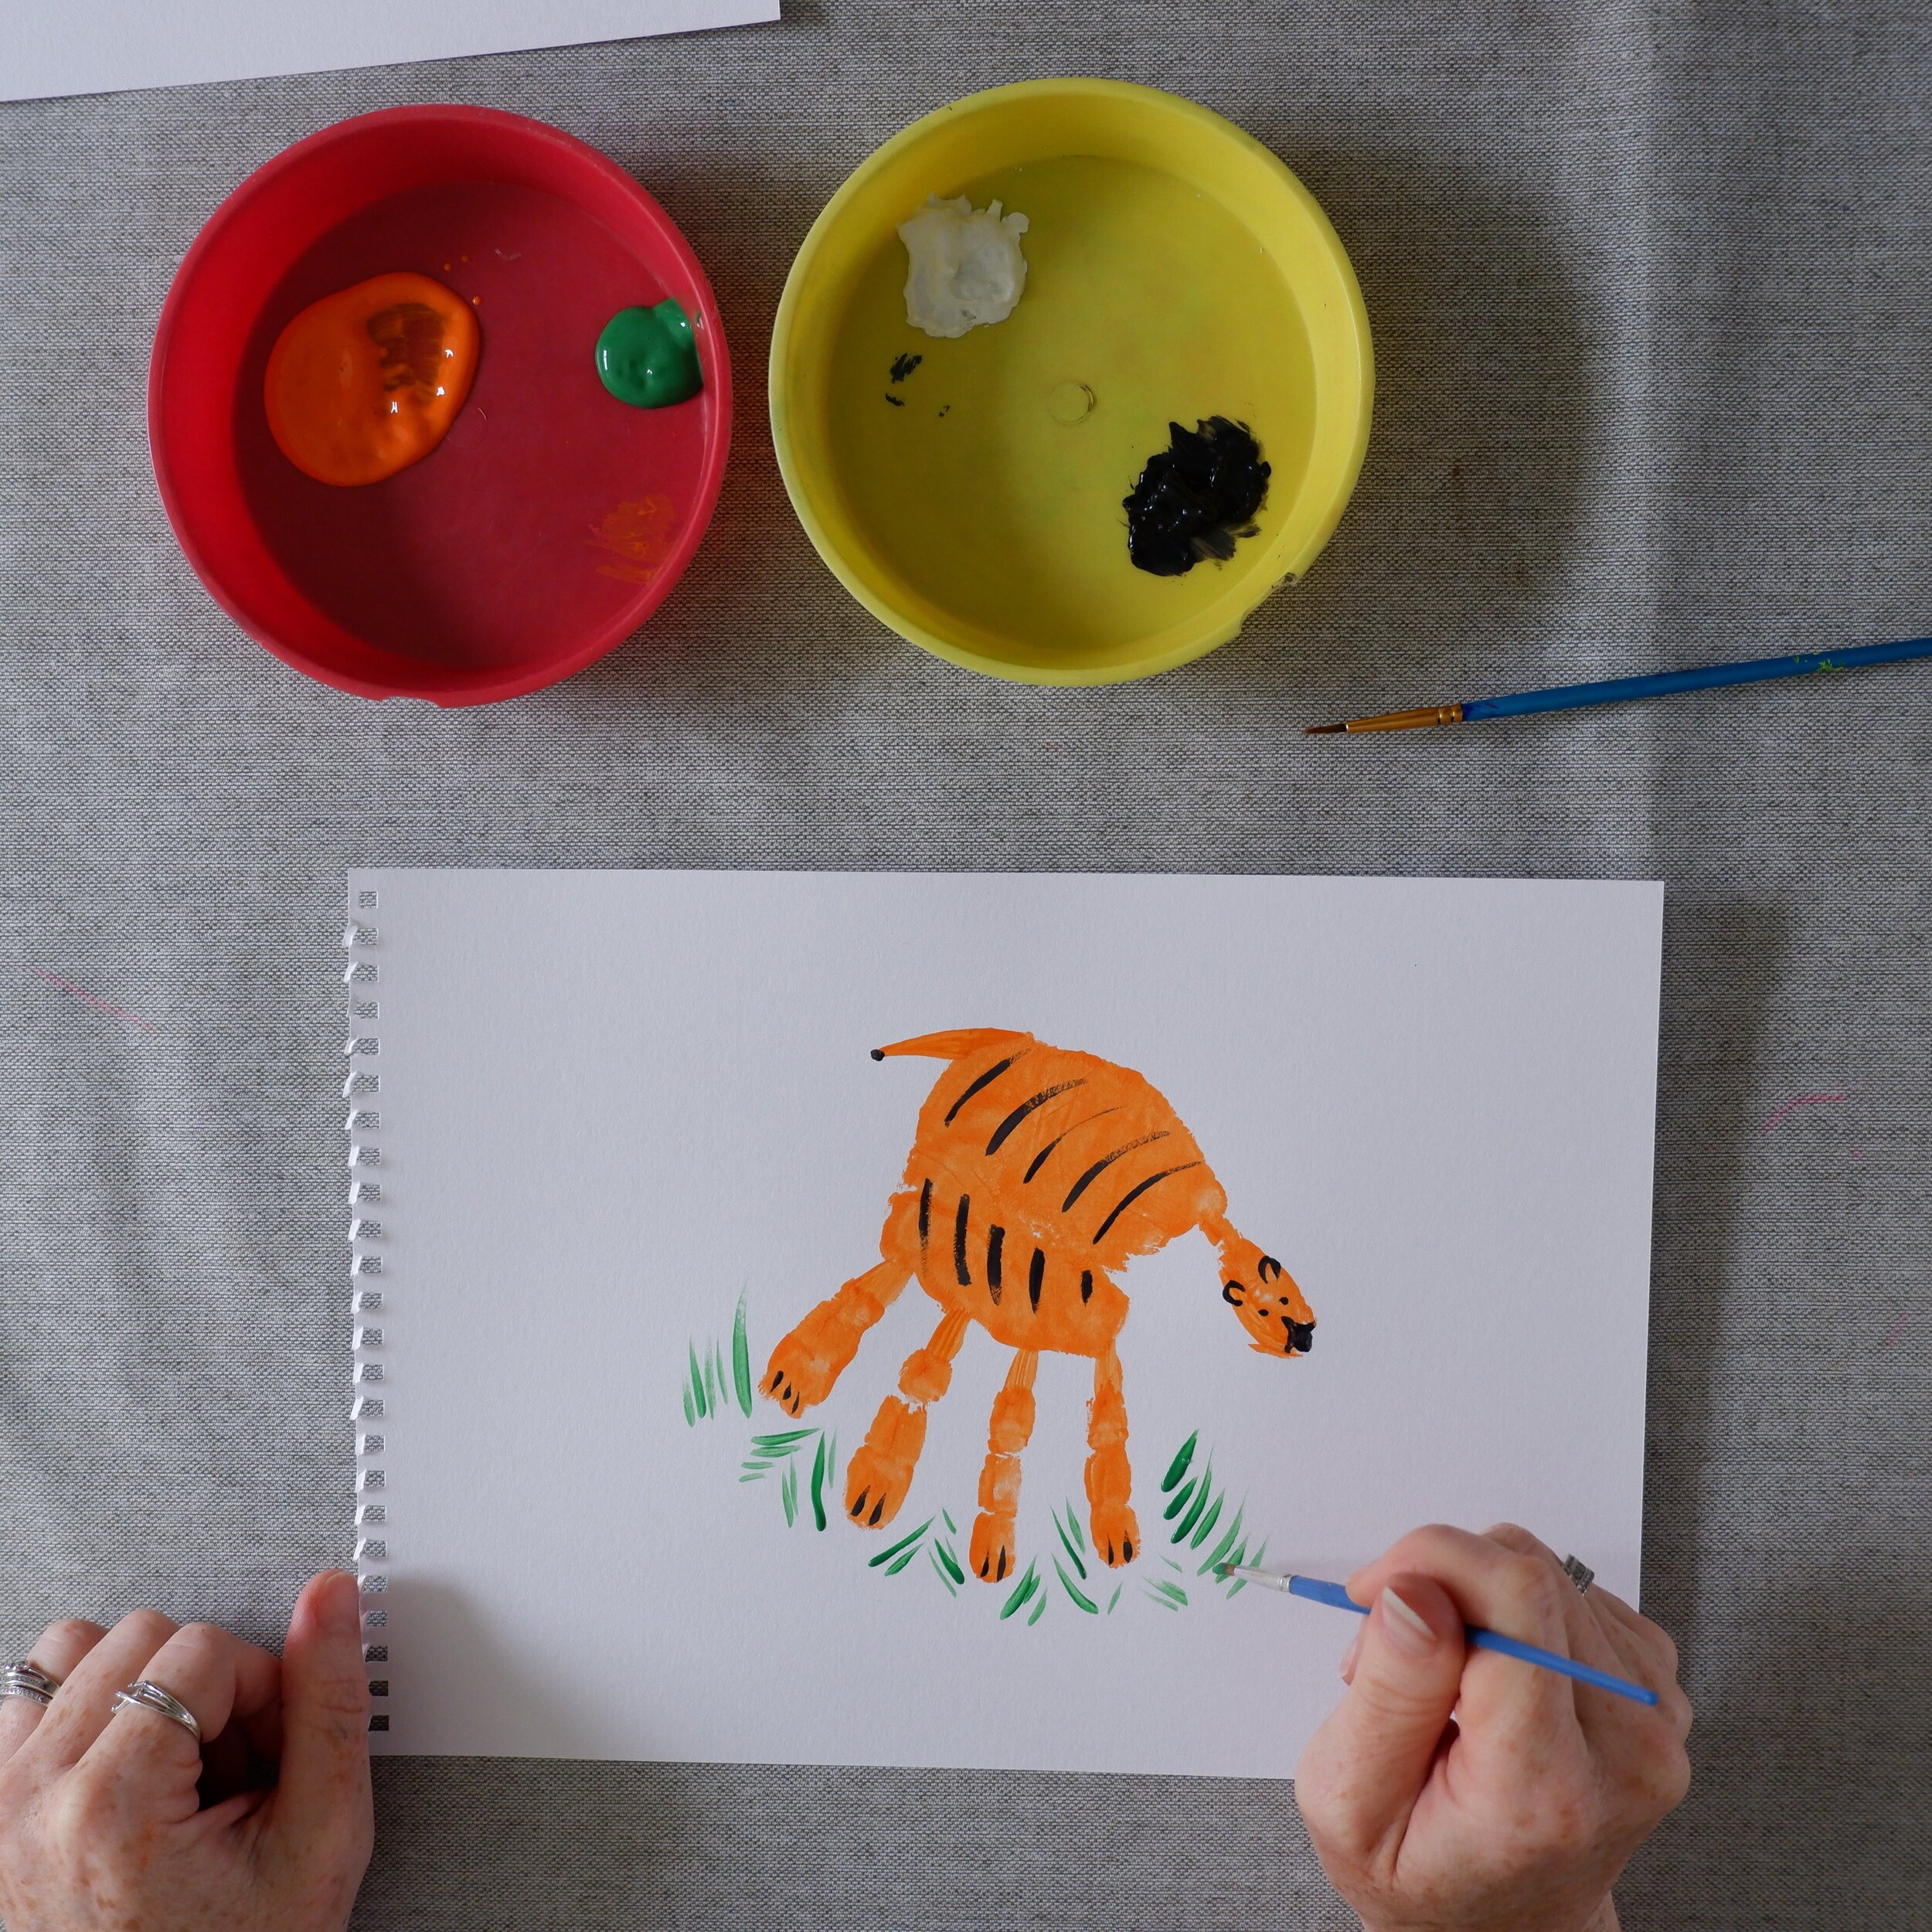
Pour some green and black paint into a tray
Use the small paint brush and black paint to add the eyes, nose and tiger stripes, as shown in the picture opposite
Use the green paint to add grass
Your handimal is complete!

I also add the child’s name and date, but this is of course up to you.

Other Handimal Examples
Below are some other ideas, ordered by easiest to most difficult:

Flamingo hand animal
Paint colours: Pink, Black and Blue
This is one of my personal favourites as it’s the first one we ever did, look at the tiny handprint! I remember my mum holding my daughter’s pink hand still while I tried to clean her up!
Use pink for the hand, adding a long neck and face, then 2 legs (1 straight, the other bent).
Use black paint for the beak, an eye and two dots for feet. I added blue water around the feet.

Dinosaur hand animal
Paint colours: Green and Black
A firm favourite in our house has always been dinosaurs. Create your own with green and black paint.
Use the green paint to add the stegosaurus’ plates, a tail and claws.
Use the black paint to add eyes, ears, a nose and teeth, then go over the spine and toes with black for extra detail.

Elephant hand animal
Paint colours: Grey (or silver), Black, Green and Blue
We used some sparkly silver paint for our elephant, but grey paint is just as good.
Use the grey paint to add a tail.
Use white paint to add a tusk, use black paint to add a large ear, a dot for the eye and tail, a little mouth, trunk detail and for the knees and toes.
You can use blue paint for the water coming out of the trunk and green for some grass detail.


Peacock hand animal
Paint colours: Blue, Green and Orange (or Yellow)
For the Peacock you need a blue handprint.
Use yellow for the beak and to add feathers all the way around the fingers.
Use black to add the crest of the top of the head, more feathers and some grass. Add a black dot for the eye.

Ladybird hand animal
Colours needed: Red, Black, White and Green
The tricky thing about the ladybird is that you need to paint the palm of the hand in red, but the fingers and tip of the thumb in black. Once you have done this, you need to wait until it is completely dry to add the white spots on the face, then wait until the white is completely dry, to add black dots to finish the face off. Use more black paint to add the antennae, the shell and the spots. I use green paint to make it sit nicely on some leaves.

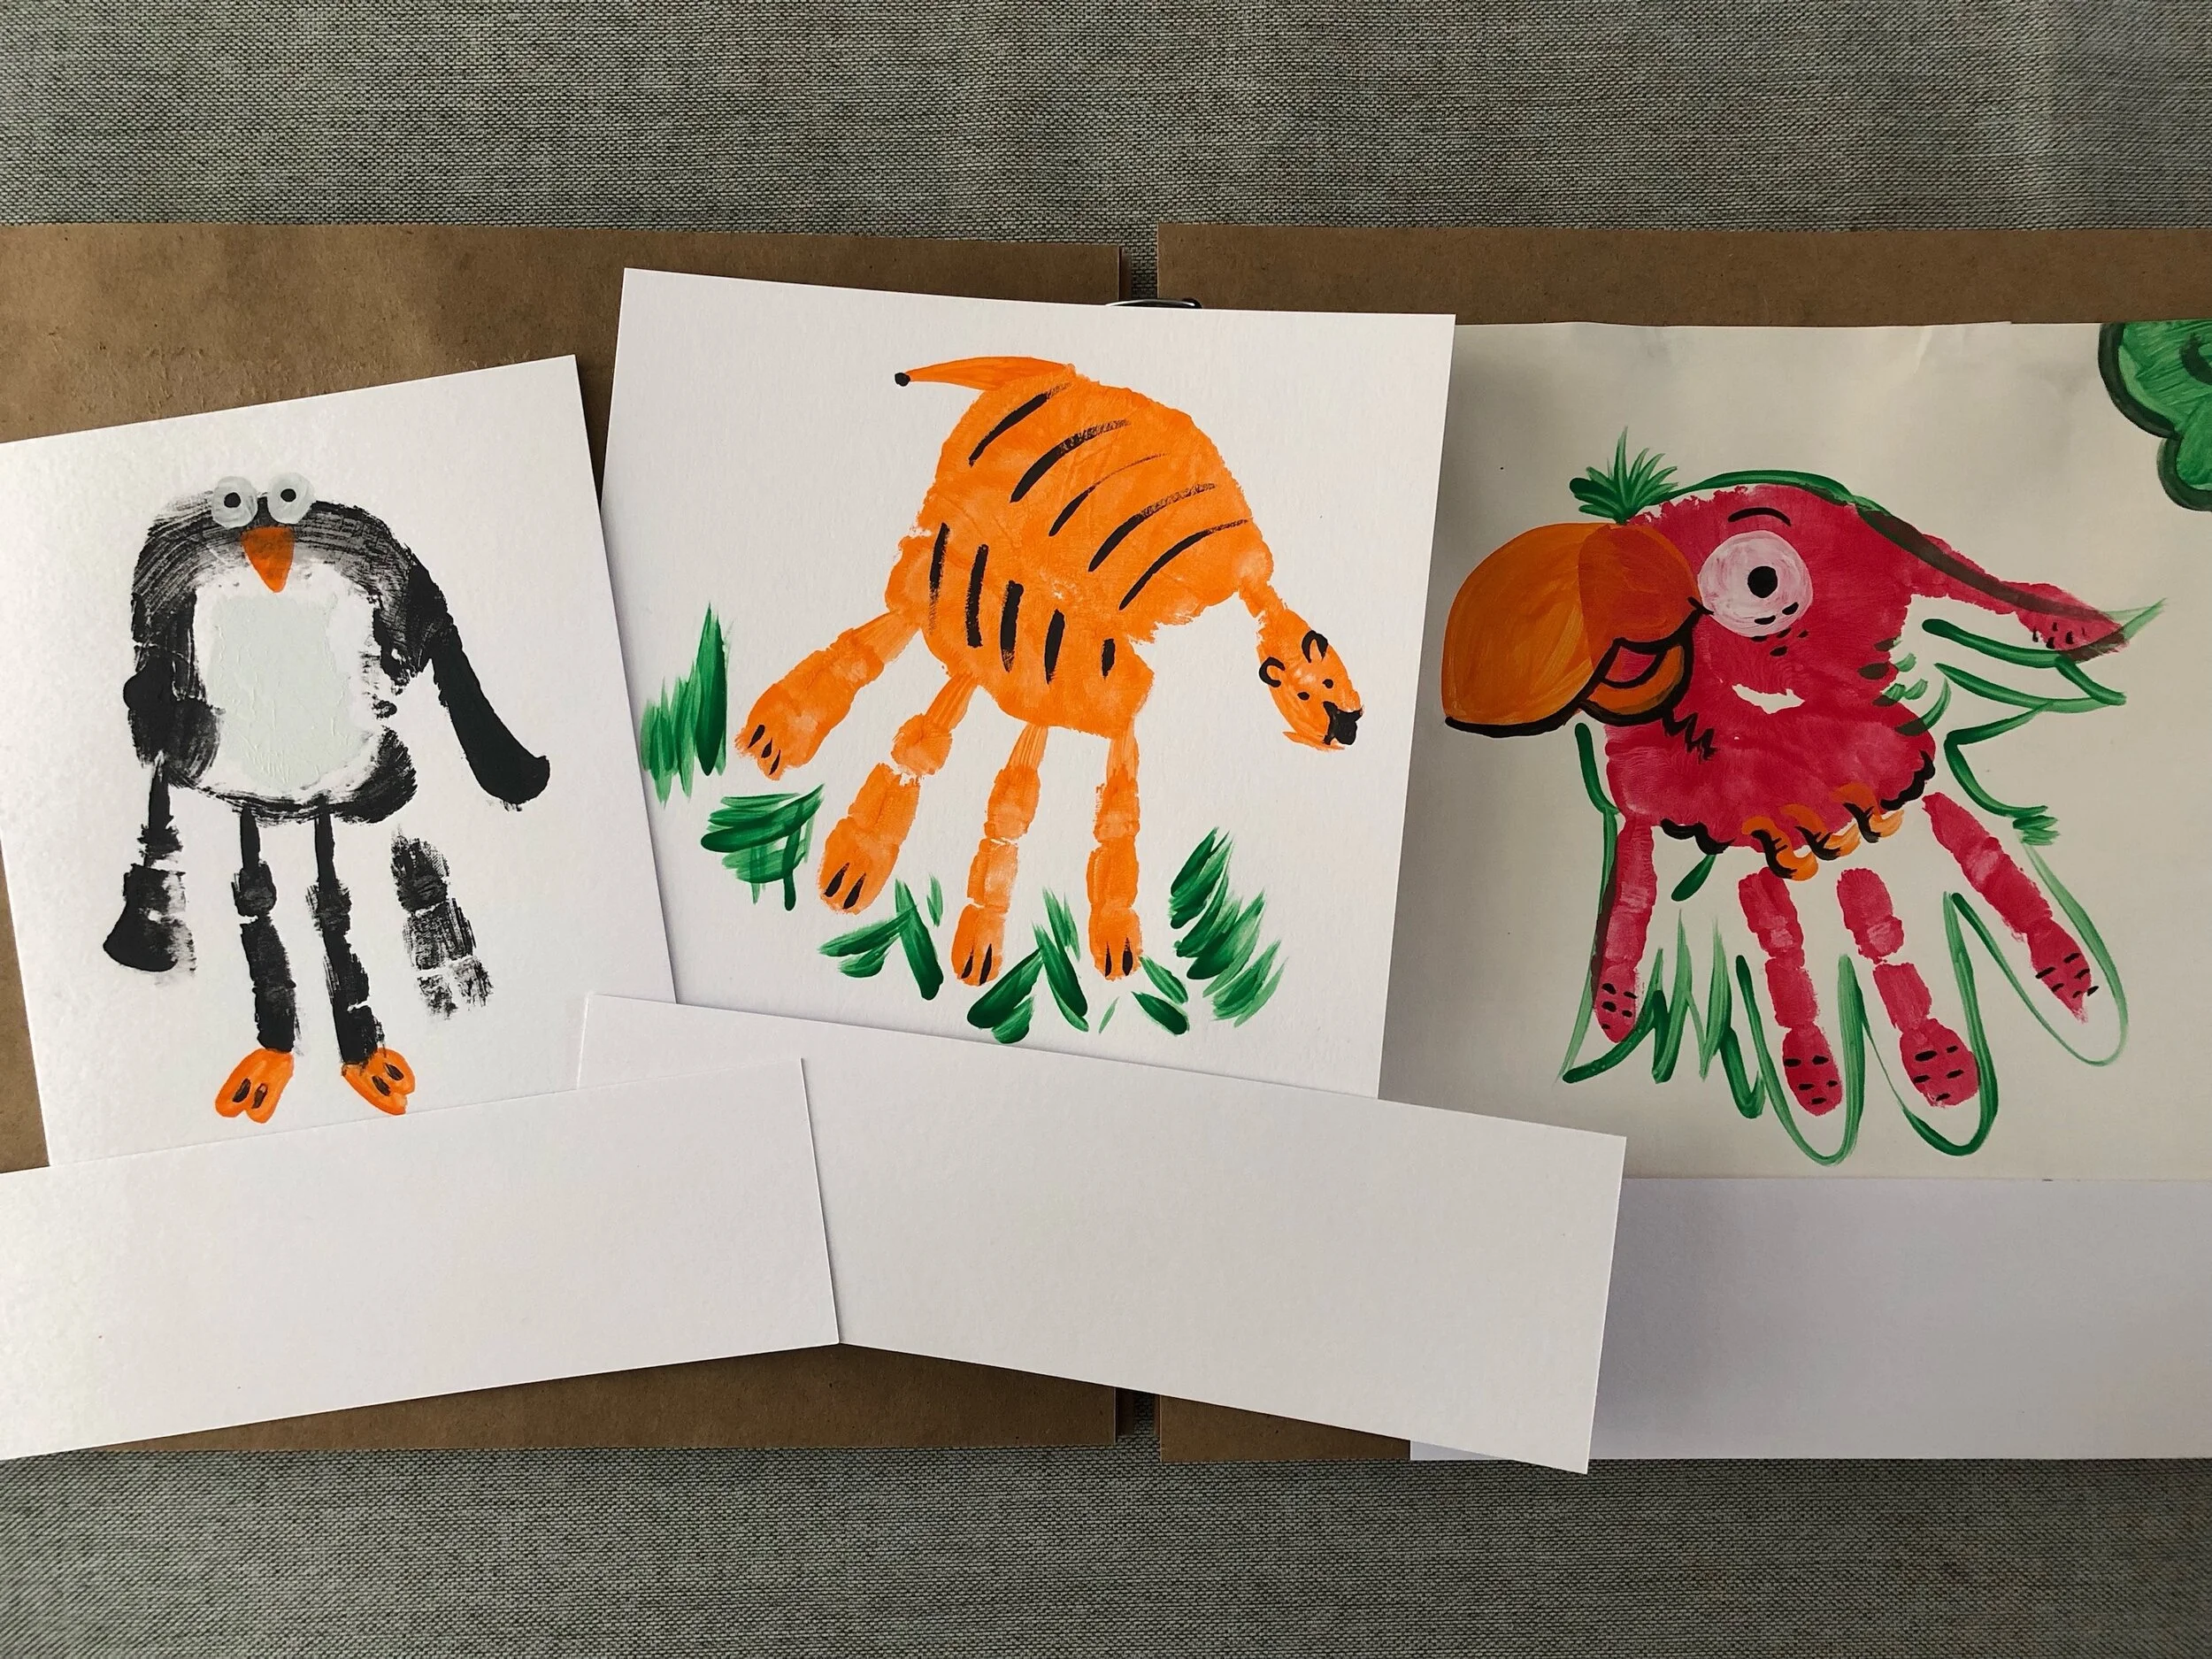
Penguin hand animal
Paint colours: Black, White and Orange (or embellishments)
My daughter’s favourite animal is a penguin, so I made a conscious effort to include penguins one year. She found some googly eyes and feet from an old Easter kit and wanted to add those for detail. You can also use feathers and other embellishments on any of the designs if you want to. This is another design where you need to paint the centre of the palm white, while the outer palm and fingers and thumb are black. Either use the embellishments or white paint for the outer eyes, then a dot for the centre. Use orange paint for the beak and feet.

Parrot hand animal
Paint colours: Red, Green, Orange, White and Black
This is one I tried for the first time more recently and as you can see my confidence had grown with adding more detail! Use the orange paint to add a beak and some feet, use white paint to make a large eye. Use green to outline the bird and some black paint for details on the beak, feet and feathers.

Owl hand animal
Paint colours: Brown, Black, Orange, Yellow
My eldest daughter requested a cute owl perched in a tree. We used brown paint for the owl and tree, adding some small ears. White paint is used for the large eyes, an orange beak and claws, black paint for the details and finish it off with a yellow moon and stars.
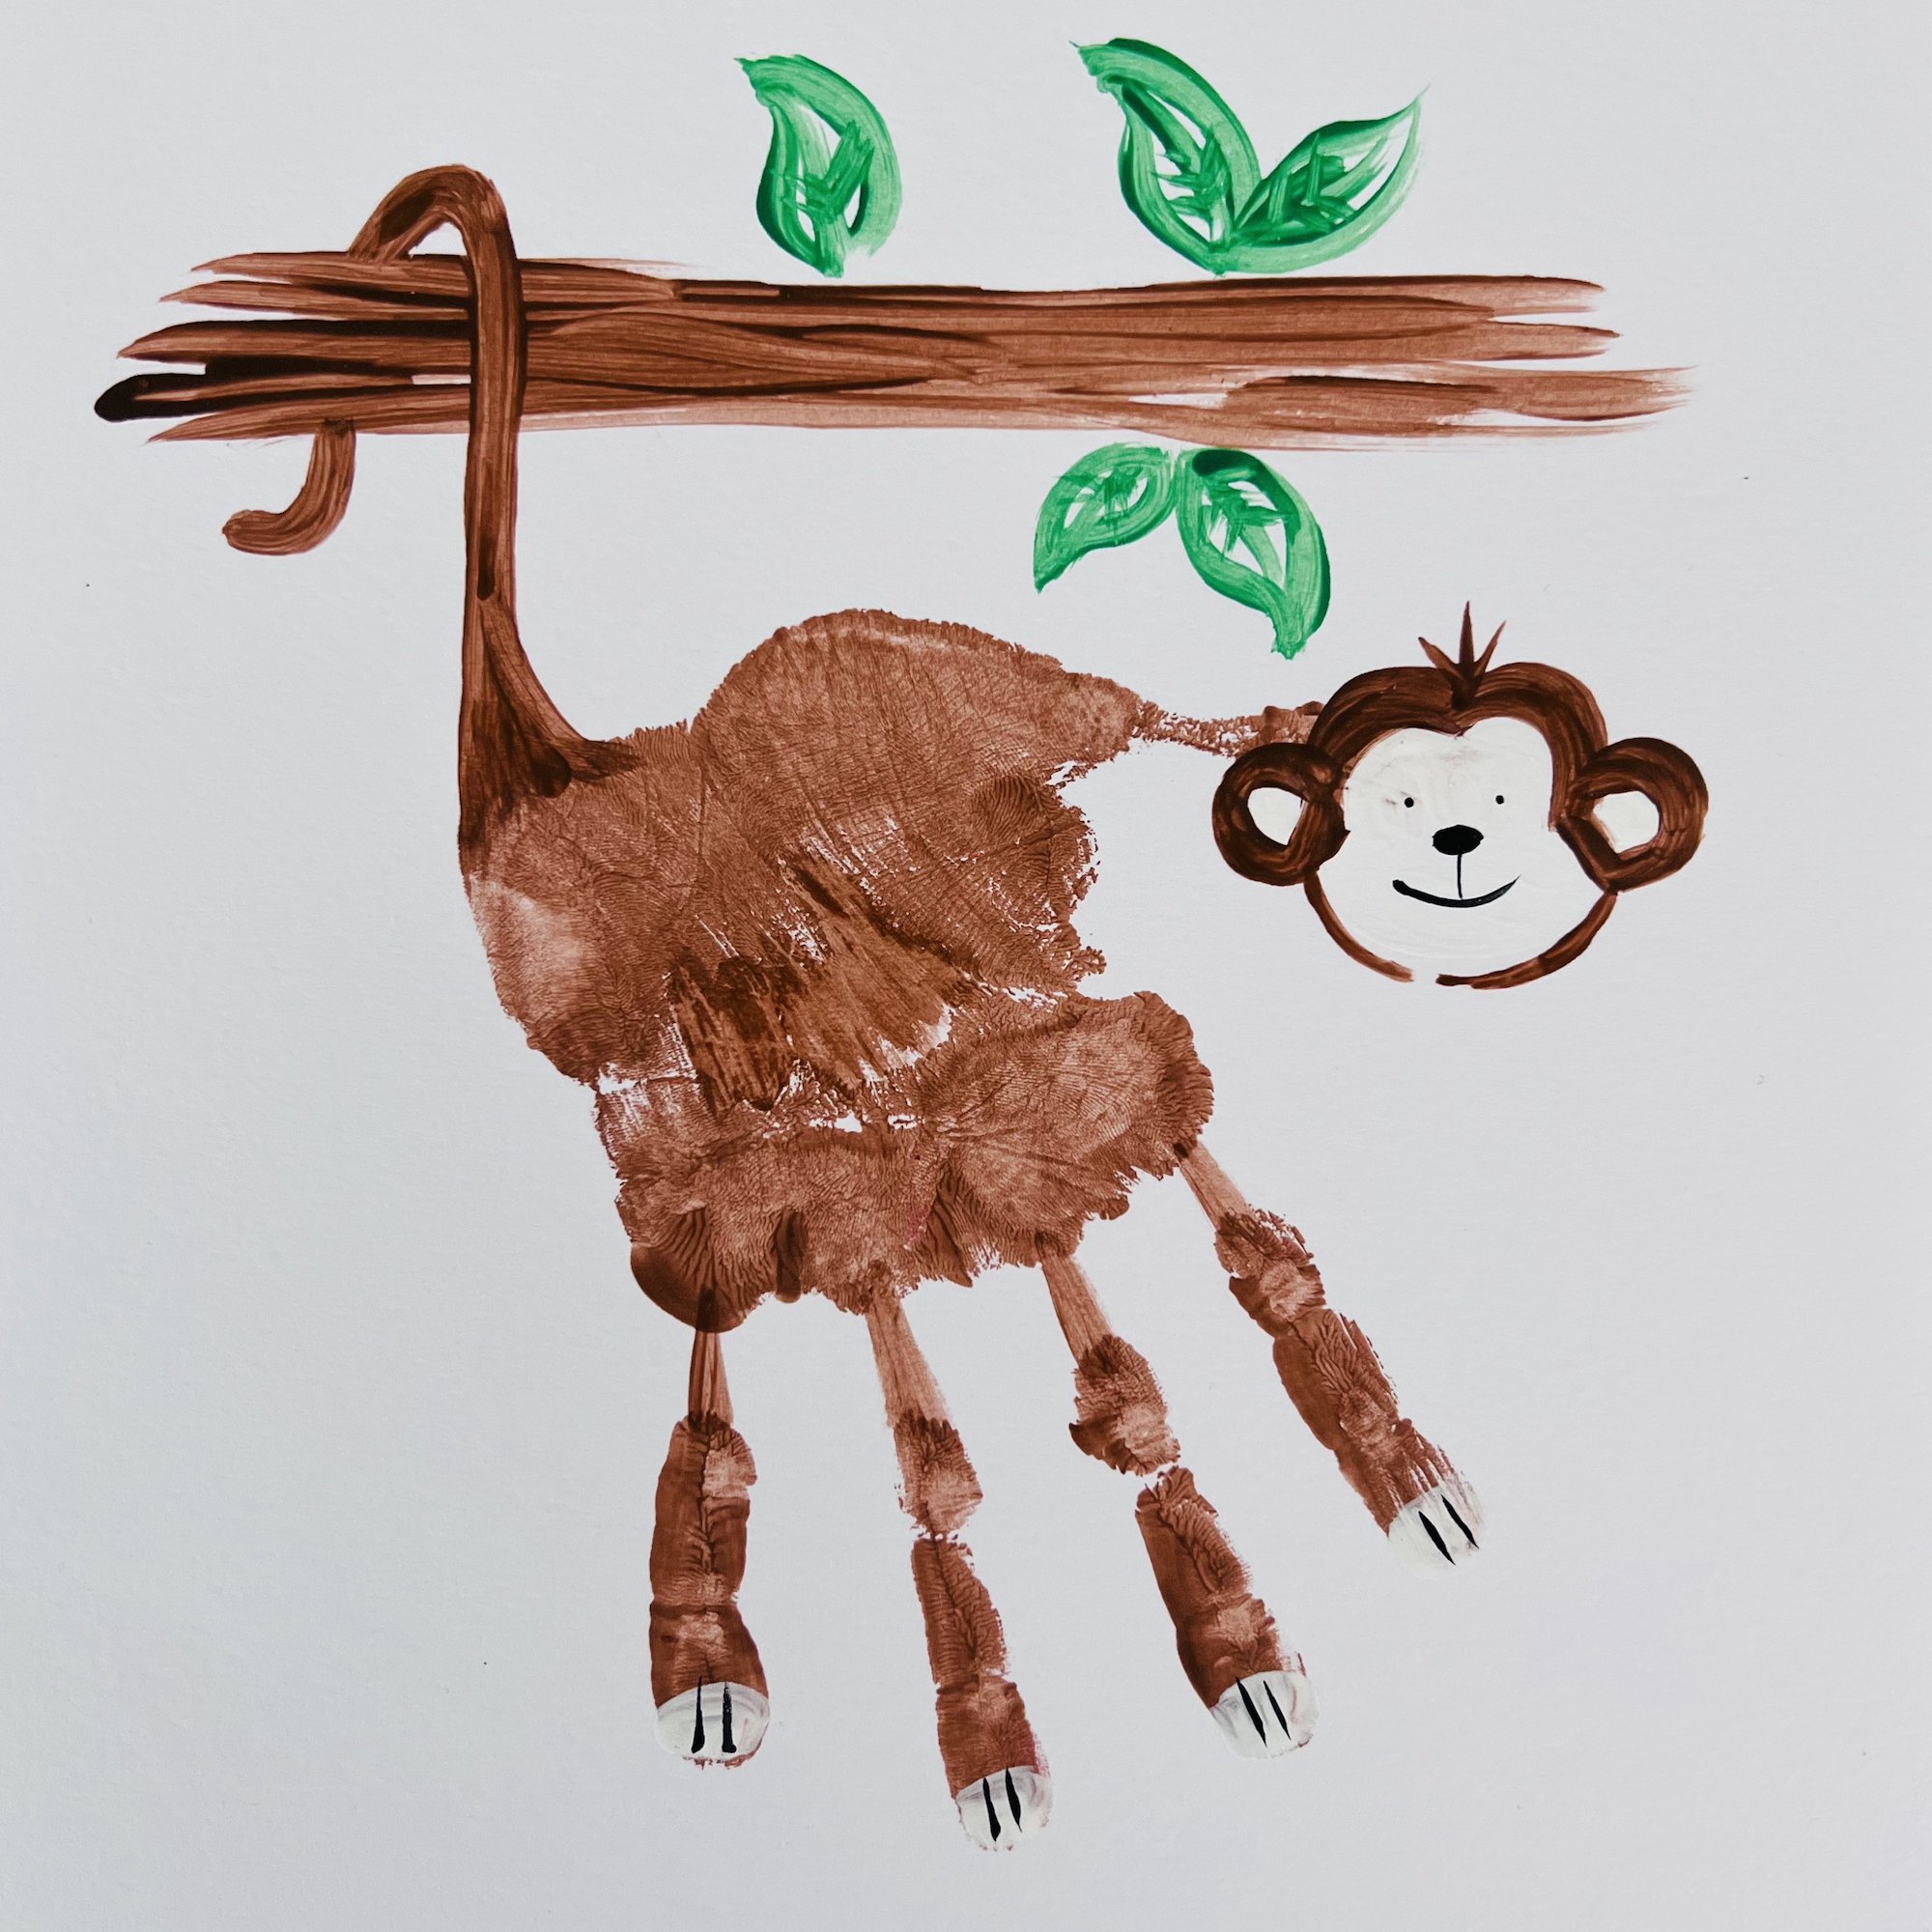
Monkey hand animal
Paint colours: Brown, White, Green
A current favourite animal of my youngest daughter is the monkey. I used brown for the animal body and a branch for the monkey to hang from. I added a white face and white for the feet. I used brown again to add a tail and face details. Black is used for the eyes, nose and mouth and feet details. The picture is finished off with by adding some green leaves.

Penguin foot animal
Paint colours: Blue, Black, White and Orange (or Yellow)
A penguin foot is really straightforward if you can get the footprint done without too much mess! The middle part of the foot needs to be white, while the rest paint in blue or black. Add blue (or black) wings, 2 black dots for the eyes and a yellow or orange beak.

I hope you have found this guide helpful and enjoy this activity as much as we do. If you have made any handimals, I would love to see them! You can email me at sarahransomeart@gmail.com.